Replicating 17th century objective lenses
I am starting this topic regarding an important part of my activity that is to re-create the techniques and lenses form the 17th century basted on different source material and literature out there also in combination to modern methods of grinding and handwork is put into this. I have decided to make single plano convex lenses that i will polish on paper with Tripoli on the convex and plano side and then testing it using modern methods but also 17t century ones, glass used is a simple window float plate glass 8mm thick and also i will began work on thinner glass plates.
This week has brought one of those rare convergences of practical insight and historical resonance that makes workshop-based optics so compelling. Like Campani retreating into his Roman rooms with nothing but glass, metal tools, and the unforgiving logic of abrasive mechanics, I have spent the better part of the week as a complete hermit, immersed in the grinding of two 52mm plano-convex singlets simultaneously one targeting a focal length of approximately 3000mm, the other 3800mm both worked on same-diameter tools, which itself represents a significant methodological departure from the classical two-to-one tool ratio described by Zahn and implied by Huygens' workshop notes.
Grinding on a tool of equal diameter to the lens is not an innocent choice and deserves honest scrutiny. The classical wisdom echoed in Zahn's Oculus Artificialis Teledioptricus, Huygens' Memorien, and confirmed by modern ATM practice prescribes a tool diameter roughly twice that of the lens. The physical reason is geometrical: a larger tool produces more even wear across the full aperture, suppresses the tendency to roll the edge, and naturally steers the curve toward a true sphere through the averaging action of the larger contact area. A same-diameter pairing means that every stroke carries the risk of overcorrection at center or turned edge at the periphery, and the self-correcting statistical averaging that saves so many ATM workers from themselves is substantially reduced. I want to be honest about this constraint I am not endorsing it as ideal, but I am working within it, learning its particular discipline, and building up a vocabulary of compensatory stroke technique that I did not possess a month ago.
Giuseppe Campani of Romania (Ovidiani Optical) has completed his first small-scale lens grinding machine, designed to imitate as faithfully as possible both the optical finishing methods of the 17th century and the modern ones, which in fact have not changed significantly over time. The technology of materials and abrasives has evolved, yet the kinematic method of generating the spherical surface through alternating motions combined with opposite rotation has remained essentially the same from the time of Campani, Huygens, and Cassini up to the present day, demonstrating that the fundamental geometric principles of optical fabrication are timeless and cannot be improved, only refined.


It was a three-day adventure in the workshop for the design and construction of this machine, whose main purpose is to ease and accelerate the lens grinding phase, reducing physical effort and ensuring a consistency of pressure and working rhythm that pure manual labor cannot guarantee over long periods. Polishing remains for now a manual operation, in full accordance with the historical tradition that this project deliberately embraces, although the possibility of experimenting with mechanical polishing on the same machine remains open for future sessions. This machine is design to grind on equal diameter lens and tool.
Also i will work in alternation on machine and also manual in case of problems arise in grinding.


Fabrication has officially commenced on a new objective lens measuring 47 millimeters in diameter. Concurrently I have cut several 66 millimeter diameter glass blanks to prepare for future production runs since this specific kinematic approach requires a strict equal diameter ratio between the tool and the working element to maintain a true spherical surface. During this session I discovered that abandoning the mechanical overarm and instead holding the upper disc directly with my fingers provides far superior tactile feedback. Furthermore this manual override achieves a significantly faster rate of volumetric material removal than the automated swing arm.
Operating with equal diameter glass discs my grinding stroke sequence is strictly defined. I utilize 3 or 4 center over center strokes followed immediately by a manual rotation of 10 to 15 degrees against the direction of the turntable spin. This opposing rotational dynamic results in highly aggressive material removal. Strict monitoring is absolutely critical here to prevent over deepening the sagitta and undershooting the target focal length. However the kinematics of this setup allow for an immediate focal length correction. If the radius of curvature becomes too tight I can simply invert the stack placing the convex lens on top which preferentially wears the center of the convex element flattening the curve and lengthening the focal length.
While I have exclusively utilized glass on glass grinding methods thus far I hypothesize that transitioning to iron or metal tools will result in a decreased grinding rate. This mechanical setup is heavily inspired by Alan Binder and his reverse grinder drill design. Binder utilized this exact mechanical configuration to generate classic extremely long focus objectives including a notable 70 millimeter aperture lens with a 17 foot focal length. Today my agenda involves completing the fine grinding sequence through 25 micron 15 micron and finally 9 micron micro grits. Following this I intend to polish directly on the machine utilizing a paper lap charged with Tripoli compound. Should the figure deviate from a spherical norm I will detach the work and proceed with localized hand polishing. Upon achieving an adequate preliminary polish I plan to transition to a felt lap charged with cerium oxide. It remains a fundamental axiom of this process that the final 9 micron surface must be flawlessly ground because an inadequately fine ground surface will fundamentally resist a specular polish even if transitioned to a traditional optical pitch lap.
Both paper and felt are highly compressible substrates. When you polish on a compressible surface the lap wraps around the edge of the glass on every stroke practically guaranteeing a severely turned down edge. And this depends on the thickness of the paper and the contact. Worse the micro compressibility of felt scourges the glass unevenly creating a microscopic surface ripple known as lemon peel which will scatter light terribly and destroy planetary contrast. A good idea is to try manually if the machine fails to produce a good figure.
Finally I must correct your assumption regarding metal tools. Roger stated that i expect iron tools to grind slower than glass and that's true but with this machine i can grind now pieces of metal discs together with 8 grid to arrive to the desired radius of curvature if i fail with the lathe cutting machine, than grind a glass disc of equal size on the concave metal tool, that metal tool must have a good spherical shape in order for the glass to mold itself on the tool.


Ok i have finish the lens, and this is my final conclusions:
First of all i have polished first with Walter paper and with aluminum oxide 1 micron, Ceo2 and Tripoli, thus Tripoli and Ceo2 works well and polish fast but this is not the problem, the huge problem is to arrive at a spherical shape with paper polishing, this is not the case for me and Roger, but still at the end of paper polishing the lens had a interesting Ronchi with a little bulge in the middle, no big deal but ok for what i want.
The huge problem in paper polishing is that making many chances of paper can actually destroy the spherical shape. I have made 3 chances of paper, i think the last one must not had happen, because it made the lens a little worse, still good but the Plano side was not grinded or polished.
So today i have grinded and polished the Plano side on felt directly on machine. For grinding 15 micron and 9 micron was enough.
But these float glass are relatively flat so a simple polishing on machine directly on pitch will do the job.
Yes, paper polishing its a nightmare done on machine, does not matter what you use, Tripoli, aluminum oxide Ceo2, yes all of them work well especially Ceo2 and Tripoli has great effect and you can see a immediate polish in just a few minutes, aluminum oxide 1 micron works slow, but sub millimeter Ceo2 and simple Ceo2 + Tripoli works at best.
And for example if you polished on paper manually you must not polish until the lens is fully shine, making numerous chances of paper until the lens is fully polished with the naked eye will result at the end in a figure that is literally a nightmare so you must chance the paper once or twice and the lens to be perfectly grinded so that the effect of polishing will work, and you can see through it and test it, its a lottery.
Now i think that paper polishing should be done manually on equal disc diameter this is my conclusion, but even that makes huge problems, because making many paper chances will eventually destroy the lens and if you are not polished completely you have a huge problem.
Its an impossible task to make the lens better and better has you chance the paper, it will not make the figure better so you need to stop before the lens is fully polished otherwise you just ruin it, and at the end you need to throw it away.
You must grind scrupulously the lens with no pinholes for that paper and Tripoli to polished the lens in other for you to test it on the sky, but in the case of Campani its impossible to fully polished the lens on paper to look like a pitch polished lens.
For Campani no matter what paper he used it will not produce a fully polished lens, no matter what you do and making many chances of paper will result in a worse figure possible, so in these case you must finish paper polishing when the lens has the best figure and then to switch to felt or dear skin something to push the polishing without destroying the figure. These is available for oversize lens grinding on laps 2x or 2.5x greater then the lens and on equal disc diameter lens and tool.
But let's presume that you can fully polished a lens with paper, this will turn at the end into a figure worse than ever for thin lenses like Campani had made, and this is much difficult because paper polishing its dry and thus it will cause severe thermal stress on the lens by friction even on thick lenses. In these case you need to paper polished in a environment with equal temperature.
So yes i think this is the reason Roger lenses and some of mine had not made into a spherical shape when paper polished, the same deal and issues with long period paper polishing even manually will turn the lens into a mess.
There are many secrets left in all the documents from the 17th century about lens grinding many things that are not introduced, from Zhan Manzini and to Huygens and others they write about these process but some of the tiny secrets are not mentioned, and these are very important.
At the end i was constrained to polished the lens on felt because if i continue to polish on paper who knows how much it would affect the shape of the lens.
In the case of Campani he had to polish on paper until the lens is transparent enough to test it, so lenses up to 8 inch in diameter was very hard to do this and to polish well, lucky the Tripoli has a fast and strong effect when polishing on oversize tool, but Campani had to be scrupulous when it comes to grinding in order for the paper polishing to have a fast effect without chaining the paper to much.
If Campani had noticed that the paper polished only the edge or the center of the lens it will immediately chance the paper with another one on the concave metal lap, he will polish one side of the lens and then the other one until you can see through it in order for him to test it, also he would observe how uniformly the polishing goes, this is important because it will tell that the lens and paper are in full contact.
Finally when the lens has a good figure he will turn to felt polsihing with wet Tripoli, and the felt probably he stick to the tool via turpentine oil and beeswax or something similar for the final polish.
Yes its a lottery in optics making lenses with paper polishing, not all Campani lenses had turn good, he had to throw a huge stock of it that had not turn well according to his expectations.
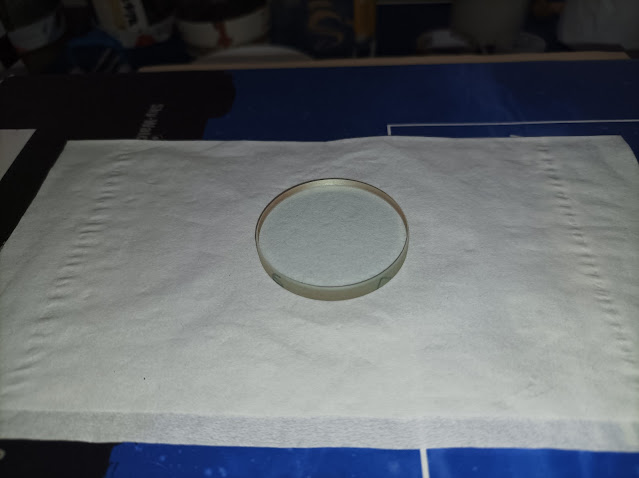
Complete Finish of the lens after polishing the plano side on machine via felt, the lens has a good figure better than before with the plano side left intact form the original blank.
It was a good adventure making a lens on a inverted drill such a good lens, thankfully i have finish paper polishing fast before the paper can ruin the lens, in such that the lens can be transparent enough to test it.
A good idea is to polish on paper manually for safety reason but it can also be employed on machine, but the paper must have a good contact and by rotation the contact is very well than manually but it depends on many factors, the thickness of the glue, the paper quality etc
Once the polish is done on paper and its uniformly distributed on machine and manually if the lens has a perfect uniformly reflection on all the surface then i can switch to felt.
Because the lens is mounted on a spindle there is not much you can do than observe the reflection pattern when polishing on paper via machine, if its perfect you can stop , take the lens off the spindle and test it.
Then you can proceed with felt polishing, or if the figure is not so good proceed with manual paper polishing. Using the felt this can be done on machine but at the final end of the polishing with felt a good idea is to polish manually since the polish will advance fast and its good for the optical figure.
Its a hard job to take the lens off the spindle and test it, attach it, and so one, better is to polish in the final stages by hand with the lens on the felt lap and to test the overall lens in order to see what you have done.
Also for the plano side its better than you have another blank separately mounted on a spindle in order to use it for other lenses for the plano side or for a specific lens, not to constrain in the process of taking of the main tool and polish the plano side of the lens with it .
Also i can polish on paper via machine with Tripoli and Ceo2 and it works fast but not to much for the friction do make problems, is better than you finish polishing on paper by hand or the entire process of polishing on paper ca be done exclusively by hand until the lens is transparent enough to test it, on a star.
Now i have polished the lens on felt manually using MOT and TOT 1/3 diameter center over center stokes and i am sorry but i was wrong, felt does influence the figure.
After 5 minutes TOT and MOT on the convex side and 5 minutes MOT and TOT on the flat side the figure of the lens its much better, quite spectacular.
I have nice airy discs at 40mm diameter and 2.4m focal length something like that, quite an impressive feat.
So my guess was perfect, polishing on paper until the lens is transparent enough but just a change of paper and than switch to machine polishing on felt because its faster with slow rpm, than polishing on felt manually is there are some problems.
Now the lens is fully polished and ready to go.
The machine is perfect for use in grinding stage and polishing manually will make the lens better, a scrupulous grinding will ensure a fast polishing on paper - check the figure and continue with felt to the end, thus after paper polishing it is a matter of time until the lens is fully polished on felt, but it must be perfectly grinded with absolutely no pits.
NEXT i will finish the other 2 lenses 52mm the 4.2m and the 3m one that was on hold, i will continue with 25 micron 15 9 and 5 micron to make a better grinding only on machine, and paper polishing with Ceo2 and super fine Ceo or Tripoli manually, when the figure is perfect i will switch to felt.


Comentarii
Trimiteți un comentariu